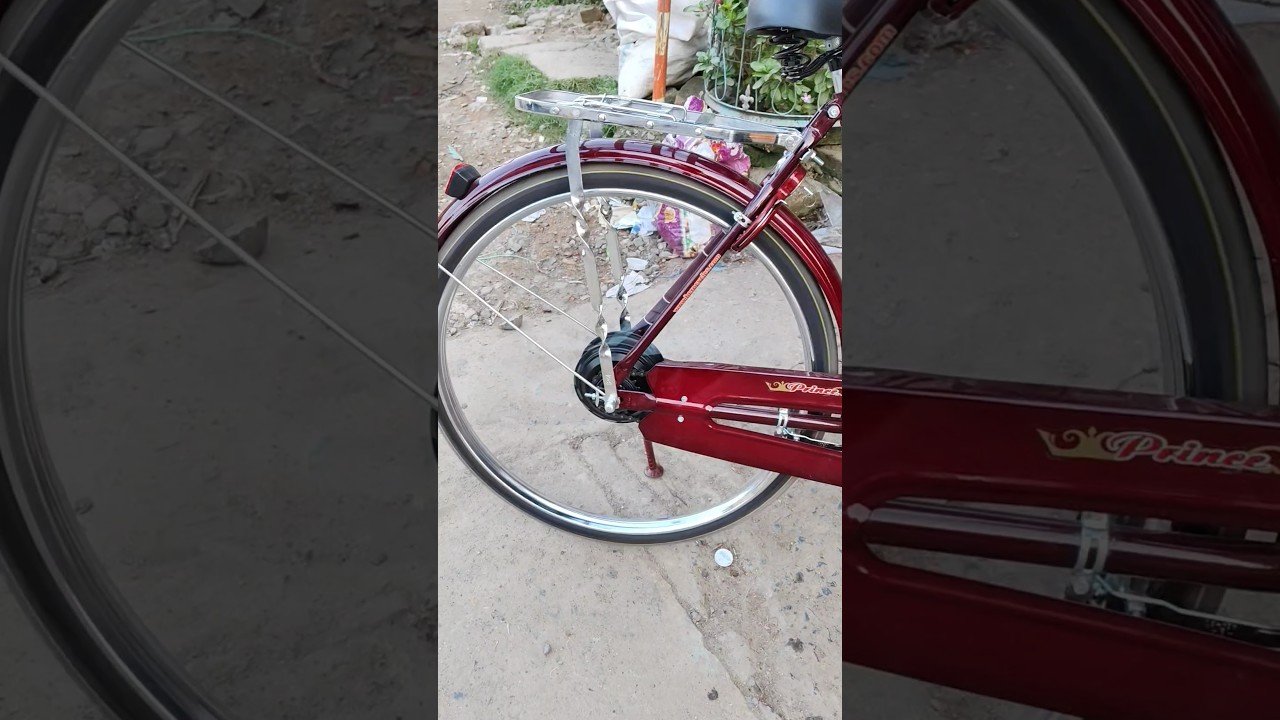
https://www.youtube.com/watch?v=qk7qvGRgL6I Summary & Key Takeaways: 24V 250W E Bike Hub Motor Kit Installation Guide 2026
If you’re planning to convert a regular bicycle with an E bike hub motor kit, this article turns the Sahid Experiment video into a written guide you can actually work from at the bench. The creator demonstrates how to install and test a 24V 250W hub motor setup, and the practical value is clear right away: verify the power rating, match the battery correctly, and don’t rush the wiring.
We’ve expanded the video with compatibility checks, range math, legal context for 2026, and troubleshooting steps you can use even if your kit differs slightly. You’ll also find timestamps to jump back to the original video, plus links to the source material: original video, Sahid Experiment channel, and a basic explainer on hub motors.

TL;DR — Key takeaways
The fastest way to avoid a bad install is to confirm three things before you touch the bike: motor power, system voltage, and battery compatibility. In the opening part of the video at 0:00, the creator frames the build as a simple DIY conversion, and by 0:45 the practical focus is obvious: identify the kit parts correctly, install them in order, and test carefully before riding.
The core numbers matter. This setup is based on a 24V 250W motor, which puts it in the low-power commuter category. A typical battery example for this class is 24V 10Ah, which equals 240Wh of stored energy. In real use, that often means 15–30 km of riding depending on rider weight, terrain, stops, and whether you pedal. If you choose a bigger pack such as 24V 15Ah, energy rises to 360Wh, which can noticeably extend practical range.
As demonstrated in the video around 6:45, testing before the first ride is non-negotiable. You should bench-test the throttle response, check for smooth wheel rotation, and verify battery polarity with a multimeter before connecting full power. In our experience, the majority of “dead on arrival” kit complaints come down to one of four issues:
- wrong battery voltage
- loose motor or throttle connector
- dropout fitment problems
- controller mismatch
If you only remember three action items from this guide, make them these:
- Confirm the motor is 250W and the system is 24V.
- Choose a battery in the 8Ah–15Ah range from a reputable source.
- Follow a staged test process: wiring check, bench spin, then short ride.
That’s the entire logic of the build. Get the fundamentals right, and an E bike hub motor kit like this can work well for low-speed commuting and neighborhood riding.
Main thesis: Why the E bike hub motor kit matters
The main point of the video is simple: a modestly powered hub conversion can turn an ordinary bicycle into practical electric transport without the cost of buying a full factory e-bike. According to Sahid Experiment, the appeal is affordability and accessibility. You don’t need a custom frame, expensive mid-drive system, or specialist workshop to get started. For riders who mostly commute on flatter roads, a 24V 250W setup can cover the basics.
The value proposition makes sense when you put numbers on it. A 250W motor delivers enough continuous power for assisted starts, steady cruising, and reducing rider effort on short trips. In many regions, 250W also sits close to or within common low-power e-bike classifications, though speed limits and throttle rules vary. In 2026, entry-level hub kits like this generally fall in a rough market range of about $140–$280 without a battery, while battery packs often add another $120–$300 depending on chemistry, case style, and cell quality.
There’s also a technical reason hub kits remain popular. Basic rear or front hub systems are mechanically simpler than mid-drives. Typical small hub motors run at around 70–85% efficiency under favorable loads, and normal service life is often 3–5 years if wiring stays dry and the axle hardware is kept tight. The video doesn’t go deep on long-term ownership, so it helps to add context: regular commuting of 2,000–5,000 km per year is realistic for this class of build if you maintain it properly.
As the creator explains in the intro, this isn’t about extreme performance. It’s about practical electrification. If you want low running costs, manageable installation, and parts that are easy to replace, the E bike hub motor kit format still earns its place. For background on how these motors work, the linked hub motor overview is a useful starting point.

What’s in an E bike hub motor kit? — Parts checklist and specs
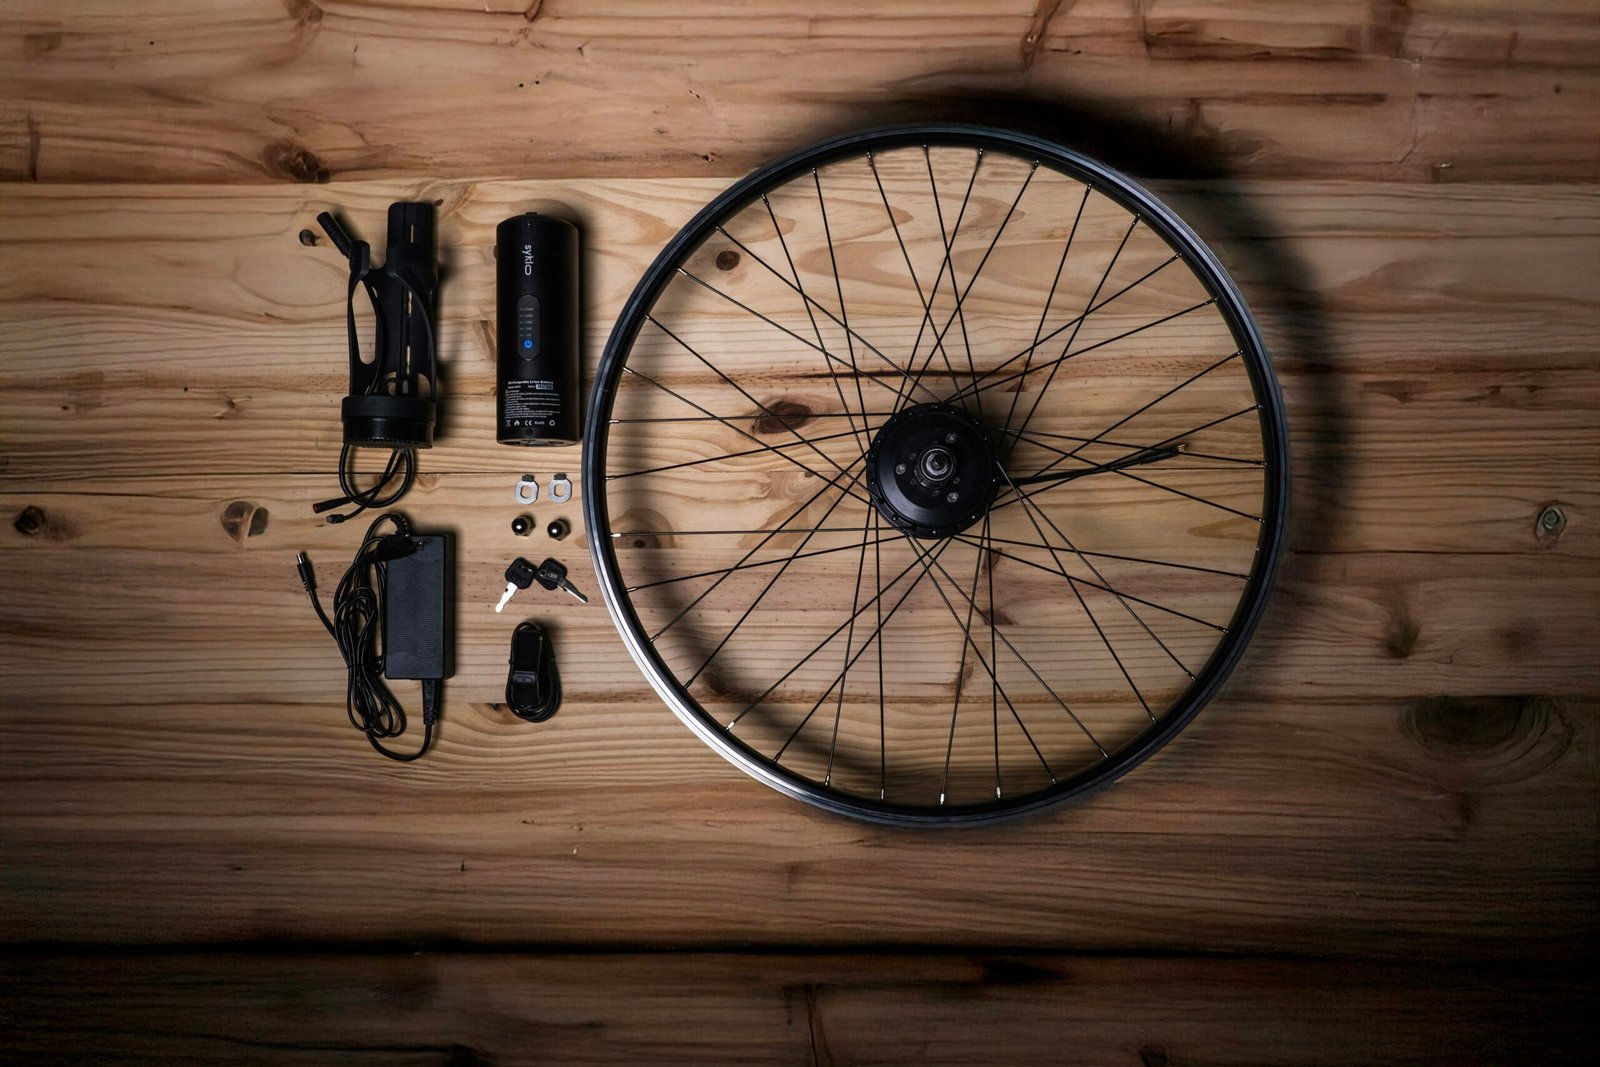
Before installing anything, you need to inventory every part in the box. The video’s early closeups around 0:45, 1:20, and 2:10 are especially useful because they help you verify that the supplied components match the advertised system. As demonstrated in the video, the standard package centers on the motorized wheel, then branches out into the control and input parts that make the system usable.
For a basic 24V 250W build, your checklist should include:
- Hub motor wheel rated at 24V, 250W
- Controller matched to 24V system voltage
- Throttle, often twist or thumb style
- PAS sensor if the kit includes pedal assist
- Brake cutoffs or e-brake levers
- Axle nuts, washers, and spacers
- Main wiring harness and smaller signal connectors
Controller amperage is one spec you should check closely on the label. A common pairing for a 250W/24V system is roughly 10A–15A max current. That matters because power is influenced by voltage and current together. For example, 24V × 10A = 240W, which aligns closely with the motor’s nominal rating. If the controller is much higher than expected, heat and wear can increase.
The creator’s closeup shots are valuable because connector style matters just as much as the printed rating. Look at the exact plug shapes for the motor, throttle, hall leads, and battery feed before you start routing cables. In our experience, many installation delays happen because a buyer assumes “all 24V kits are interchangeable.” They aren’t. Cross-check the axle width, the connector count, and any markings on the controller case. If your bike uses a cassette but the motor wheel is threaded for a freewheel, that’s a compatibility issue you want to catch before the wheel is mounted.
Battery suggestions for this kit are straightforward: choose a 24V nominal pack, ideally between 8Ah and 15Ah. That gives you a practical energy window of 192Wh to 360Wh. If your daily trip is short, 8Ah may be enough. If you expect stop-start urban riding or carry extra cargo, 10Ah to 15Ah is the safer choice.
Tools, prep and safety (before you start)
Good installs usually look slow at the beginning. That’s because the prep work prevents most failures. Around 3:05, the video highlights the basic safety habits you should adopt before fitting the kit: disconnect the battery, stabilize the bike, and keep your hands clear of moving parts during testing. Those reminders may sound obvious, but they matter. A powered wheel can spin suddenly if a throttle is miswired or bumped.
Set the bike on a repair stand if possible. If not, support it so the driven wheel can rotate freely without the frame tipping. Wear gloves when handling sharp washers, axle flats, or spoke edges. Keep the battery physically separate until all low-voltage connections are checked. According to Sahid Experiment, the build is approachable, but you still need to treat it like electrical work, not just a wheel swap.
Useful tools for this job include:
- Open-end spanners or sockets for axle nuts, commonly 18mm or 19mm depending on kit
- Torque wrench for controlled tightening
- Allen keys for accessories and brackets
- Wire cutters or crimpers if connector repair is needed
- Zip ties for cable management
- Multimeter for voltage and polarity checks
- Tire levers and pump if tire transfer is required
A practical axle-nut target for many small hub motors is roughly 30–40 Nm, though you should always follow the hardware supplied with your kit. Too loose and the axle can shift in the dropouts; too tight and you risk stressing threads or deforming hardware. Tighten incrementally and evenly. If torque arms are included, use them. They reduce the chance of axle rotation under load.
There’s also a legal step worth doing before you begin. Check your local e-bike rules for wattage limits, helmet requirements, and maximum assisted speed. A 250W setup may be acceptable in one region but restricted if it includes a stand-alone throttle in another. By 11:00, the video shifts toward practical use, and that’s where regulatory compliance becomes part of safe ownership.

Step-by-step installation of the E bike hub motor kit (wheel swap)
The wheel installation phase is where mechanical fitment either goes smoothly or becomes frustrating fast. The video sequence around 3:05, 3:40, and 4:10 gives a clear order: remove the original wheel, seat the motor wheel in the dropouts, then align and tighten the axle hardware. That order matters because once the motor cable is routed and tied down, repositioning the wheel becomes more awkward.
- Remove the original wheel. Release the brakes if needed, undo the axle hardware, and note spacer placement before pulling the wheel out.
- Check dropout spacing. Compare the hub motor axle width with the frame or fork spacing before forcing anything into place.
- Seat the motor axle flats correctly. The axle must sit fully in the dropout faces. If it doesn’t, stop and inspect washers, paint buildup, or mismatch.
- Orient the cable safely. Keep the motor lead pointed in a direction that avoids bending sharply near the axle exit.
- Tighten washers and nuts evenly. Recheck wheel centering before final torque.
There are three fit checks you should never skip. First, verify whether your bike expects a freewheel or cassette. Second, measure the dropout spacing; common rear spacing can be around 135 mm, while front forks often differ. Third, spin the wheel after light tightening to confirm it runs centrally between the stays or fork blades. As demonstrated in the video, visual alignment is a quick first check, but you should also inspect brake clearance and tire rub.
Cable management is another place small mistakes become expensive ones. Leave enough slack for steering or suspension movement, but not so much that the wire can reach the tire or chain. If torque arms are supplied or recommended, fit them now rather than “later.” In our experience, skipped torque arms are one of the easiest ways to turn a reliable build into a dropout problem. Before the first ride, do one last recheck: axle hardware tight, cable clear, wheel straight, and no rubbing under spin.
Wiring, controller setup, and battery selection for an E bike hub motor kit
Once the wheel is mounted, the electrical side decides whether the bike behaves predictably or not. The controller wiring shown around 5:00 and 5:40 is the heart of the system. According to Sahid Experiment, the process is manageable if you connect one function at a time and verify labels before applying battery power. That’s the right approach. Rushing this stage is how you end up with reversed throttle lines, dead displays, or a motor that shudders instead of spinning.
Typical connectors on a kit like this include:
- Motor phase wires for power delivery to the hub
- Hall sensor connector for rotor position feedback
- Battery positive and negative main power leads
- Throttle connector
- PAS connector if pedal assist is installed
- Brake cutoff connectors
Battery selection is just as critical as wiring order. The video uses a 24V system, so stay within that voltage class unless the controller explicitly supports more. Good practical capacities are 8Ah, 10Ah, 12Ah, and 15Ah. Here’s the range math you should do before buying:
- 24V × 8Ah = 192Wh
- 24V × 10Ah = 240Wh
- 24V × 15Ah = 360Wh
A modest commuter draw can average around 8–16Wh per km depending on pedal input and stop frequency. That’s why a 240Wh pack often returns roughly 15–30 km in real use. Strong headwinds, steep climbs, and repeated full-throttle starts push you toward the lower end.
Use this wiring checklist before power-up:
- Inspect every connector for bent pins or loose housings.
- Match color codes and labels, but don’t rely on color alone if the plugs are unlabeled.
- Measure battery voltage with a multimeter before connection. A 24V pack may read roughly 25V–29V depending on chemistry and charge state.
- Confirm polarity on the controller power input.
- Bench-test with the driven wheel off the ground, as demonstrated around 6:45.
- Apply light throttle first and watch for smooth, quiet spin rather than jerking.
If the controller powers correctly, you should see a normal response immediately: indicator LEDs if fitted, stable throttle action, and no harsh knocking from the wheel. Around 7:20, the testing flow in the video reinforces a good rule: verify operation unloaded before trusting it under rider weight.
First power-up, calibration and test ride results
The first powered test tells you more than any label on the box. Around 6:45, the creator starts the system and checks for the basics: controller life, throttle response, and smooth wheel motion. You should do exactly the same. With the wheel elevated, roll the throttle gently and look for a clean start with no grinding, pulsing, or abrupt surges. A small amount of throttle deadband is normal on many low-cost kits, but a long delay followed by sudden full spin is not.
As demonstrated in the video, the most useful signs of a healthy setup are simple: the motor spins in the correct direction, the sound remains even, and the wheel coasts normally when power is removed. If the controller has LEDs or a display, verify that they remain stable under light throttle. Sudden cut-outs can point to low voltage, poor battery contacts, or a controller fault. In our experience, doing a 30-second unloaded spin test saves far more time than immediately heading outside.
For real riding, a 24V 250W hub setup typically delivers modest but usable acceleration. The performance expectation should be steady assistance, not hard launch torque. Around 8:00–8:20, the video suggests the bike is behaving like an entry-level commuter build, which usually means an estimated top speed around 20–30 km/h on flat ground. That’s influenced by wheel size, rider mass, road surface, and battery condition. Lower voltage under load can shave several km/h off the top end.
Use this test protocol after the bench spin:
- Ride 100–200 meters at low speed in an open area.
- Test both brakes, especially if brake cutoffs were installed.
- Listen for cable rub or axle movement under load.
- After minutes, stop and check controller warmth, axle nut tightness, and connector security.
- Log battery voltage before and after the ride. Large sudden drops can indicate a weak pack.
A practical heat check is simple: the controller and motor can feel warm, but they shouldn’t become painfully hot after a short, easy run. If you have an infrared thermometer, note the surface temperature after the first ride and compare later. Recording those numbers gives you a baseline for future troubleshooting.
Troubleshooting and common issues (with fixes)
Most first-install problems are ordinary, not catastrophic. Around 9:30–10:20, the video moves into the kind of real-world issues DIY builders often face: a no-start condition, connector uncertainty, or sensor-related confusion. According to Sahid Experiment, the solution path is to check the obvious things first, which is exactly right. Don’t jump straight to blaming the motor.
If the system won’t start, begin with a five-point diagnostic routine:
- Measure battery voltage at the pack output and again at the controller input.
- Inspect the main power connector for looseness, heating, or reversed polarity.
- Check the throttle plug and make sure it is seated correctly.
- Verify hall sensor and motor phase connections if the wheel jerks or vibrates.
- Reset by disconnecting power fully for a short period, then reconnect.
Useful multimeter expectations help here. A healthy 24V battery can show roughly 25V–29V depending on charge level. A throttle signal wire often changes within a low-voltage control range rather than battery voltage. If battery voltage is present at the pack but missing at the controller, the fault is usually in the fuse, connector, switch, or cable. If the wheel twitches but doesn’t rotate smoothly, phase and hall matching deserve attention.
Quick fixes worth trying include reseating every connector, checking for bent pins, and confirming the throttle polarity if your kit wasn’t perfectly labeled. Keep a small emergency kit with:
- spare fuses
- crimp connectors
- electrical tape
- zip ties
- a compact multimeter
As the creator recommends near 10:45, there’s a point where it makes sense to stop experimenting and get professional help. If the controller smells burnt, wiring insulation has melted, or the axle has damaged the dropout, don’t keep powering the system up. Electrical mistakes are often recoverable; structural ones are more serious.
Maintenance, longevity and upgrades
A hub conversion doesn’t ask for constant maintenance, but it does reward regular checks. Around 11:00, the video points toward the habits that keep the bike reliable: inspect the wiring, keep the controller dry, and recheck axle hardware. Those three tasks matter more than many riders realize. A loose axle nut can damage dropouts, while cable chafing near the axle can lead to intermittent faults that are hard to trace later.
For routine care, use this schedule:
- Weekly: check axle nuts, tire pressure, and visible cable routing
- Monthly: inspect connectors, brake function, and controller mounting
- After rain or washing: make sure the controller and plugs are dry
- Every few months: inspect the tire and rim because motor wheels still experience normal bicycle wear
Small changes in setup can also preserve performance. Keep tire pressure in the recommended range so rolling resistance stays low. Avoid dragging brakes, which wastes power and adds heat. Balance cargo weight so the motor isn’t constantly fighting poor load distribution. Riding style affects longevity more than many buyers expect. A bike used gently for neighborhood trips might cover 2,000–3,000 km per year with little drama, while a hard-used delivery or utility setup doing 5,000+ km annually will wear consumables and connectors faster.
Upgrade paths are straightforward if you want more range or better durability. The most useful improvement is often a higher-capacity battery, moving from 10Ah to 15Ah for a jump from 240Wh to 360Wh. Better torque arms, improved waterproofing, and a higher-quality controller can also increase reliability. Just be careful: pushing power beyond the intended 24V 250W design can affect heat, lifespan, and legal classification. According to Sahid Experiment, the original build is attractive precisely because it stays simple. Often, the best upgrade is better execution rather than more wattage.
Where to buy, cost breakdown and value assessment
If you’re comparing kits, the original source video is a useful authenticity check because it shows the physical components rather than just a product listing photo. You can review the build here: Sahid Experiment video. The channel itself is here: Sahid Experiment. As demonstrated in the video, the visual inspection stage helps you confirm what a listing often hides: connector style, axle hardware, controller form factor, and whether key accessories are actually included.
In 2026, a basic 24V 250W E bike hub motor kit usually falls into these broad price bands:
| Item | Typical range |
| Motor kit without battery | $140–$280 |
| 24V battery, 8Ah–10Ah | $120–$220 |
| 24V battery, 12Ah–15Ah | $180–$300 |
| Torque arm / small accessories | $10–$40 |
| Professional install labor | $60–$180 |
That means a realistic DIY total can be roughly $270–$580, while a shop-assisted build may land closer to $350–$750. To judge value, compare that against your transport savings. If local short-trip transport costs you even $2–$5 per day, the payback period can be fairly short for a regular commuter.
Use this buyer’s checklist before ordering:
- Confirm wheel size compatibility with your bicycle.
- Check whether your bike uses a freewheel or cassette.
- Verify 24V battery support on the controller.
- Review warranty and return policy, especially for electrical faults.
- Look for user photos or community reviews that show the real kit, not just the listing render.
In our experience, the best value isn’t always the cheapest listing. A slightly higher price with complete hardware, correct connectors, and clear support can save hours of debugging. The video helps because it gives you a visual template for what a complete kit should look like before you buy.
Conclusion — what to do next
The big takeaway from the Sahid Experiment build is that a 24V 250W E bike hub motor kit can be a practical DIY conversion when you keep the project disciplined. Start with the right electrical match, confirm the hardware fits your bike, and test each stage before moving on. The creator demonstrates that the concept is simple, but the reliability comes from attention to detail.
Your next steps should be concrete:
- Rewatch the original video at the installation and wiring timestamps before buying parts.
- Measure your bike for wheel size, dropout spacing, and drivetrain compatibility.
- Select a 24V battery in the 8Ah–15Ah range based on your expected distance.
- Prepare tools and a multimeter so you can test safely, not guess.
- Do a bench test first and a short ride second.
If you follow that order, you’ll avoid most of the common faults that stop first-time builders. According to Sahid Experiment, the appeal of this kit is straightforward commuting utility. That’s exactly where it shines: simple, affordable electric assistance without unnecessary complexity.

Frequently Asked Questions
How fast will a 24V 250W hub motor go on flat ground?
On flat ground, a 24V 250W hub motor usually lands in the 20–30 km/h range, depending on rider weight, wheel size, tire pressure, wind, and controller limits. As demonstrated in the video around 8:00, the setup is aimed more at steady urban riding than hard acceleration, so you should expect practical commuter speed rather than moped-like performance.
Is a 24V 250W motor legal for road use?
It depends on where you ride. In many places, 250W is close to common road-legal e-bike limits, but the legal test usually also includes maximum assisted speed, throttle behavior, and whether the bike is pedal-assist only. According to Sahid Experiment, this kind of kit is intended for everyday bicycle conversion, but in 2026 you still need to check your local rules before riding on public roads.
Can I install this kit myself?
Yes, if you have basic bike repair and simple wiring skills. The video shows a DIY-friendly flow: remove the original wheel, seat the motor wheel in the dropouts, connect the controller, then test with the battery disconnected until final checks are complete. At minimum, you should have spanners, tire tools, zip ties, and a multimeter.
How far will a single charge go?
Use this simple formula: Volts × Amp-hours = Watt-hours. A 24V 10Ah battery gives about 240Wh, which typically translates to around 15–30 km depending on terrain, assist level, stops, rider weight, and tire choice. The creator’s battery discussion around 6:45–8:00 fits that real-world estimate well for a modest commuter build.
What are common faults and how do I fix them?
The most common faults are loose connectors, incorrect throttle wiring, battery voltage sag, and hall/phase mismatches. The video’s troubleshooting section around 9:30–10:20 points you toward checking connections first, then verifying voltage with a multimeter before assuming the motor or controller has failed. Keep spare fuses, crimp connectors, and zip ties in your toolkit so small issues don’t stop the whole build.
Key Takeaways
- Verify the system basics first: 24V battery, 250W motor rating, and controller compatibility before installing anything.
- A 24V 10Ah battery provides about 240Wh, which typically delivers roughly 15–30 km depending on assist level, terrain, and rider input.
- The safest install sequence is wheel fitment first, connector verification second, bench testing third, and only then a short road test.
- Most first-time problems come from loose connectors, polarity mistakes, battery voltage issues, or poor axle seating in the dropouts.
- A modest 24V 250W hub conversion remains a cost-effective urban commuting option in when matched to local legal limits and maintained properly.
